Leggi la guida completa in italiano: Eclissi Solare del 12 Agosto 2026 (Italiano)
Complete photography guide: how to shoot it, where to see it worldwide, and how to stay safe.
Background photo: Baily’s Beads and solar prominences, total solar eclipse of April 8, 2024, Dallas. Source: NASA/Keegan Barber
On August 12, 2026, the Moon will cover the Sun in one of the most anticipated eclipses in decades: the first total solar eclipse visible from mainland Europe since 1999.
In this guide you’ll find everything you need to photograph it safely: equipment, camera settings, where to see it around the world, and the eye and camera protection rules, all verified against reliable technical sources.
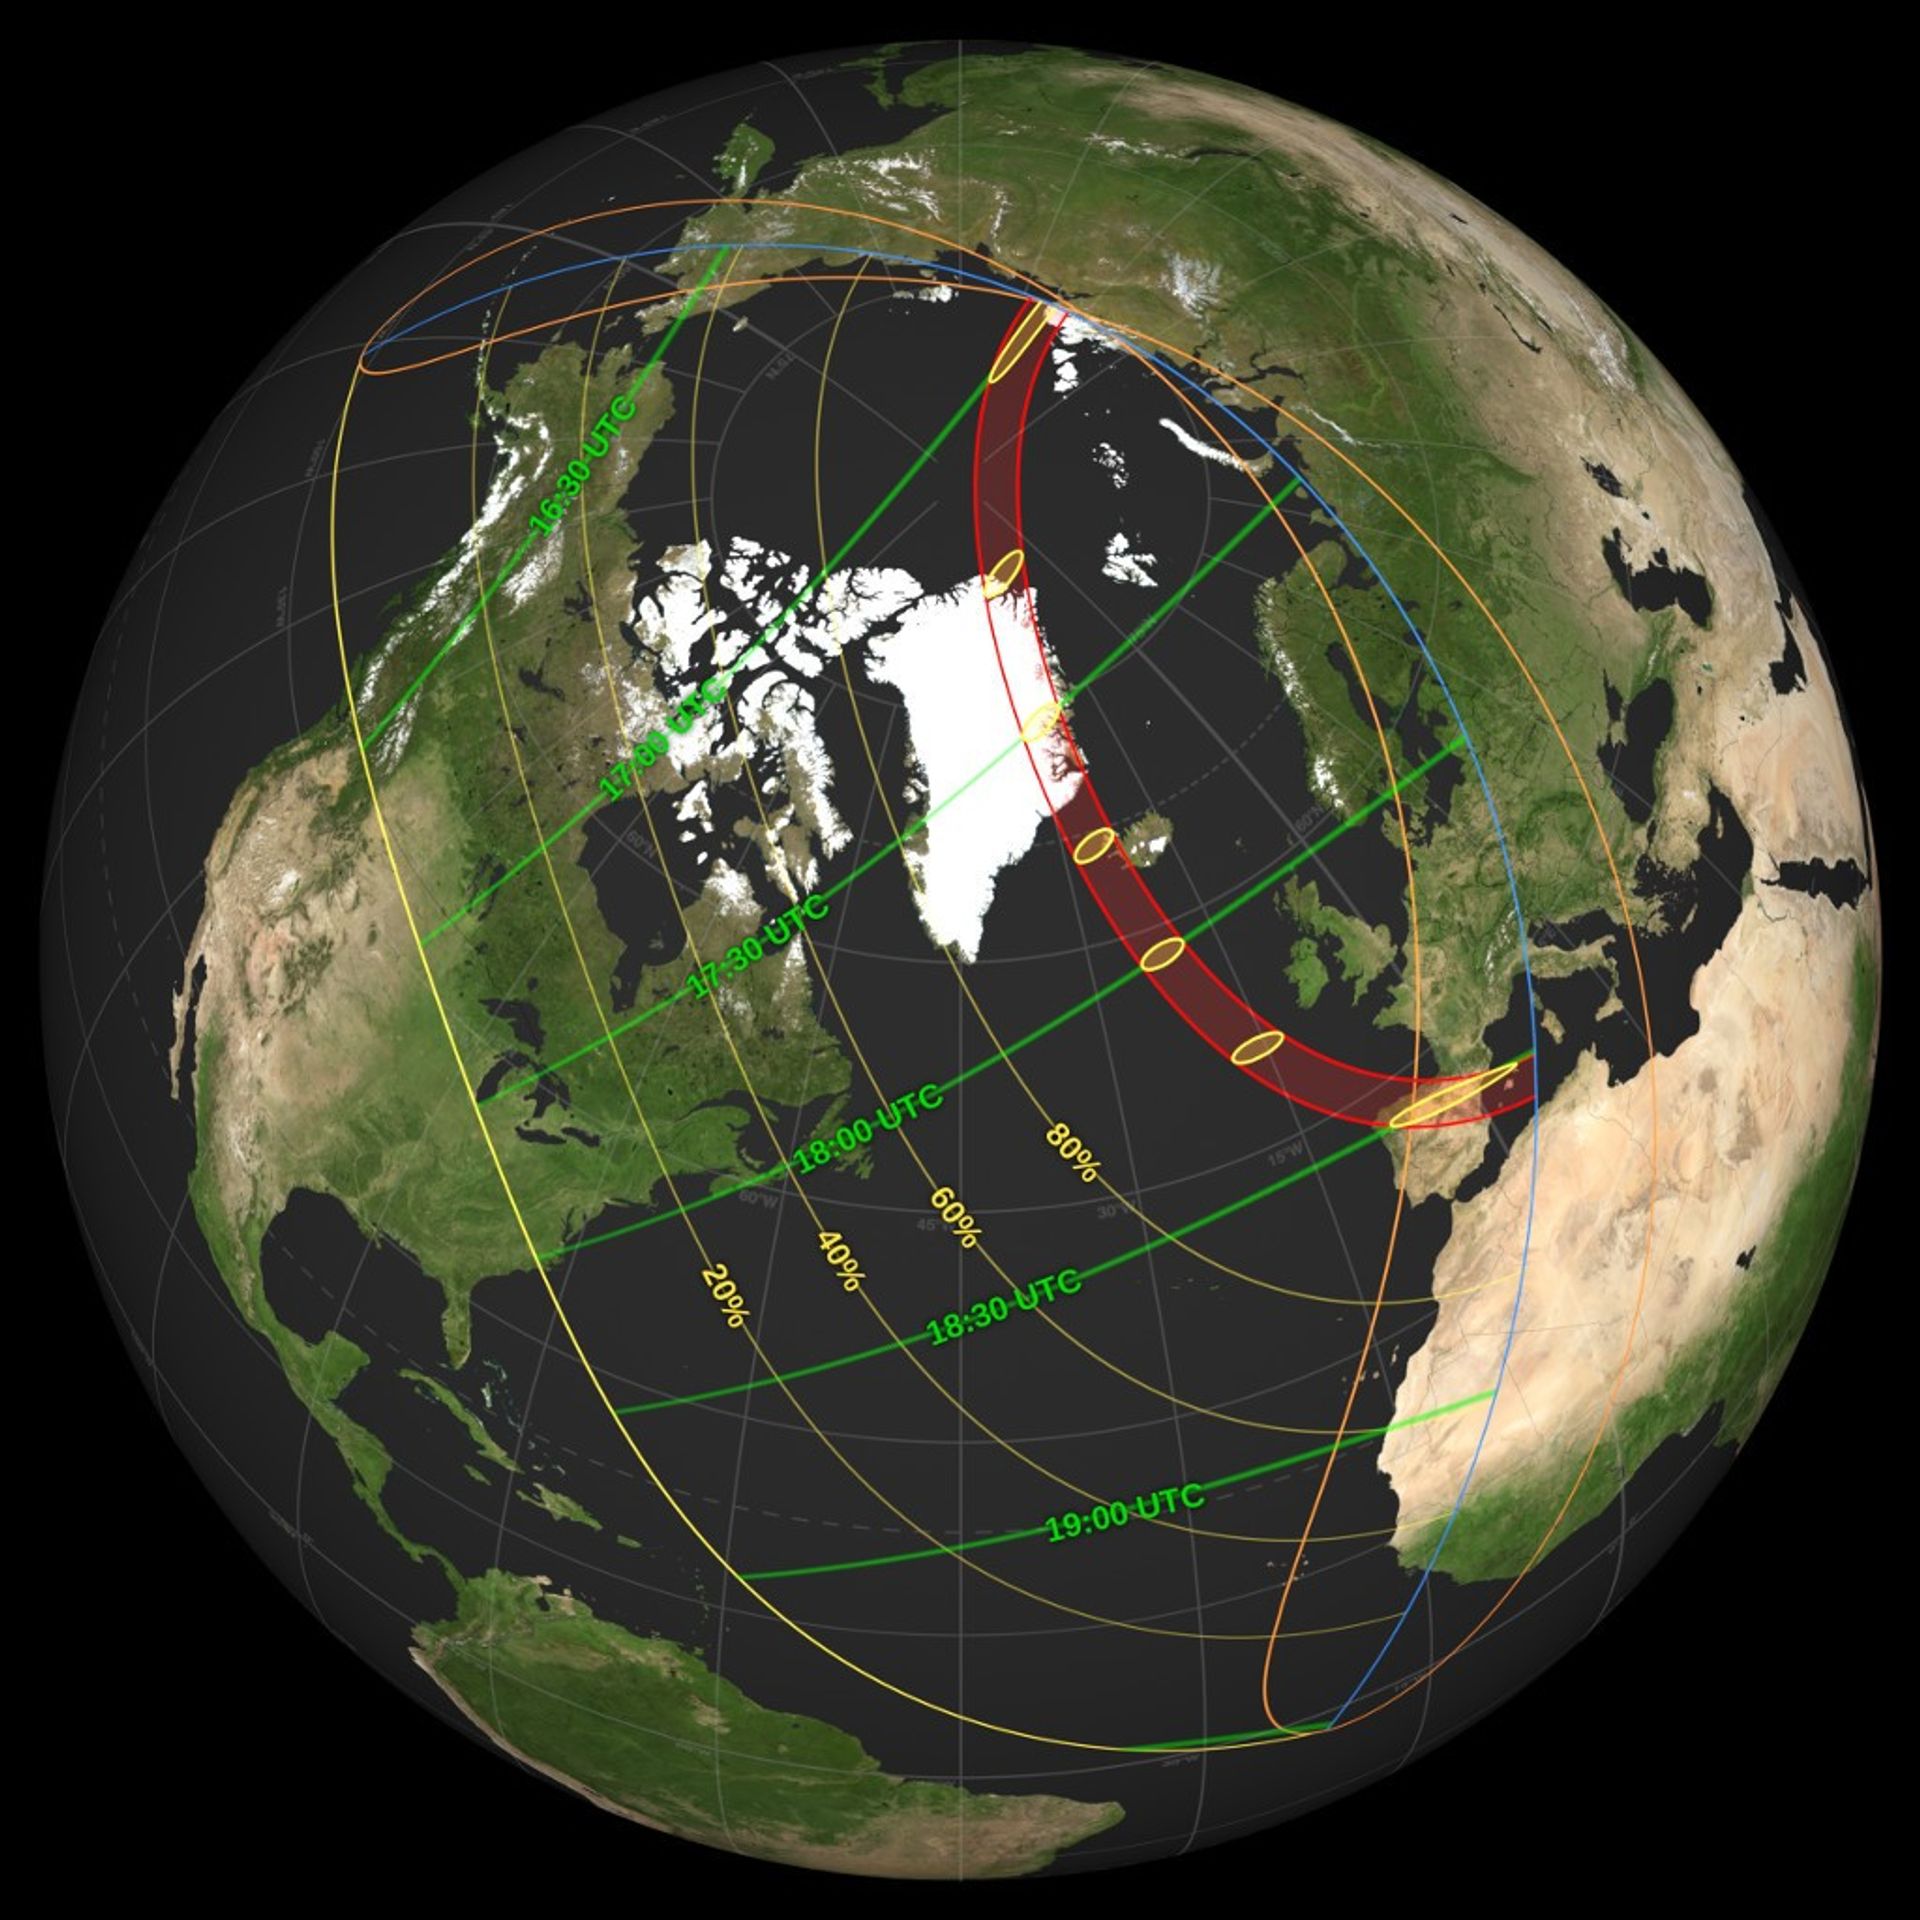
Source: NASA Science / NASA’s Scientific Visualization Studio
Before you start (quick answers)
- Will my regular ND filter work? No. A regular ND filter, even a 10-stop one, isn’t strong enough and isn’t safe: see the safety section.
- Do I need to remove the filter if I’m only seeing a partial eclipse? Never: outside the path of totality the eclipse stays partial the whole time, so the filter must stay on for the entire event.
- Can I look at it with the naked eye? Never without certified ISO 12312-2 glasses, not even when it looks “almost fully covered.”
- Do I need a telephoto lens? No: you can also choose a wide-angle lens and include the landscape, with the Sun as a small element in the scene.
1. What is a total solar eclipse
A total solar eclipse happens when the Moon passes directly between the Sun and the Earth, completely blocking the Sun’s disk for a few minutes.
The event is only visible along a narrow strip of the Earth’s surface, called the path of totality: outside this path, the Sun is only partly covered.
On August 12, 2026, a new total solar eclipse will take place, the first visible from mainland Europe since 1999.
The path of totality will cross Arctic Russia, Greenland, Iceland, northern Spain, and the Balearic Islands, ending shortly after sunset over the Mediterranean Sea.
Maximum totality will last about 2 minutes and 18 seconds, but only over the Atlantic Ocean: on land, in Spain, the real maximum duration will be just under 2 minutes.
Across most of Europe, including Italy, the UK, and Ireland, the eclipse will only be visible as a partial eclipse: the Sun will never be completely covered, but the spectacle will still be remarkable.
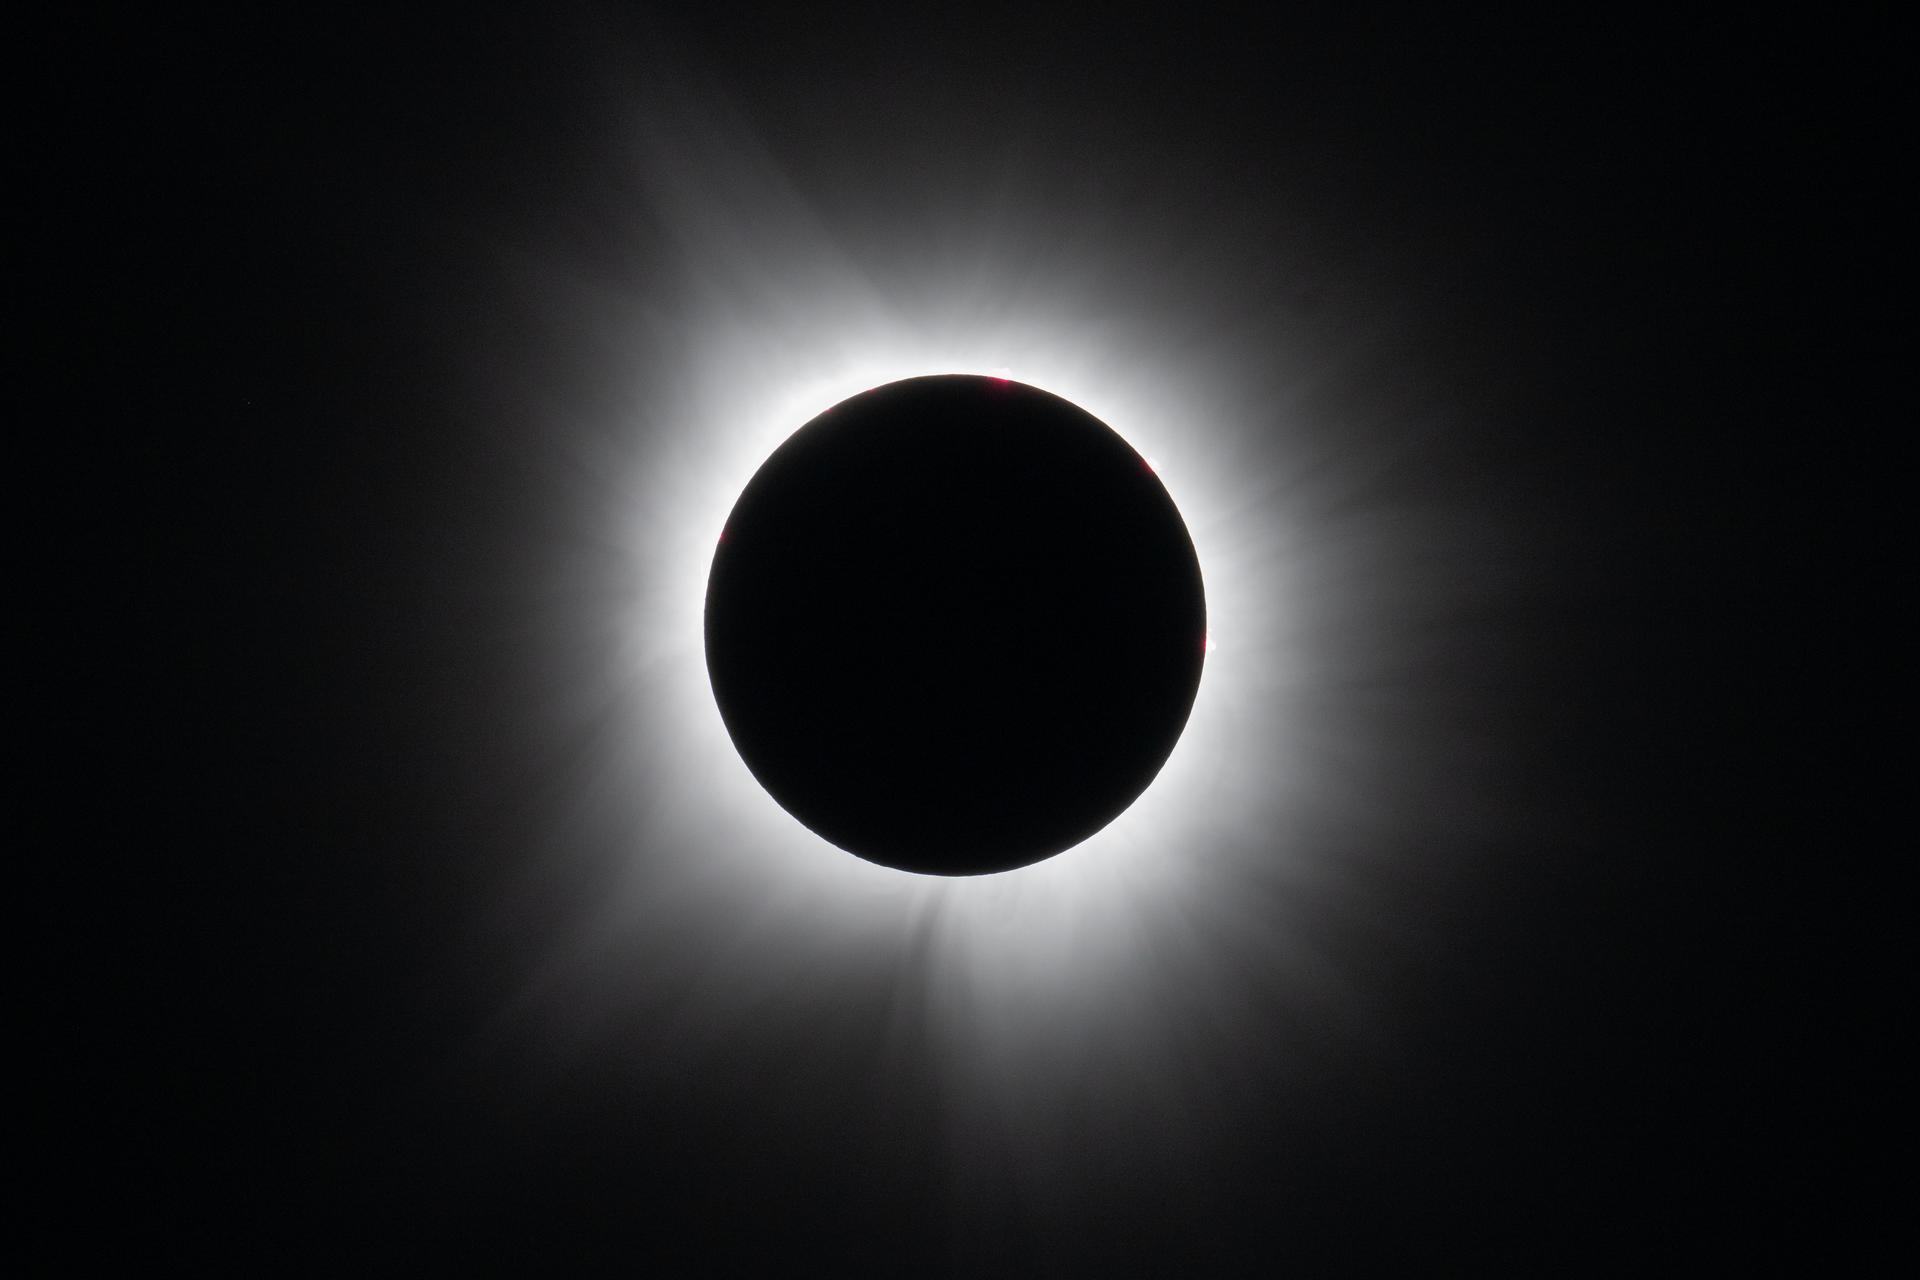
Source: NASA / Keegan Barber
The photosphere, the Sun’s bright surface, is completely blocked by the Moon: this finally reveals the corona, the Sun’s faint outer atmosphere, normally hidden by its intense brightness.
The Moon blocks almost all of the Sun’s direct light: brightness drops suddenly, with an effect similar to a very fast sunset. Outside the path of totality, where the eclipse stays partial, this effect will only be hinted at, never complete.
They’re the beads of light that appear for an instant just before and just after totality, caused by the last rays of sunlight passing through the mountains and valleys on the Moon’s edge. They’re named after astronomer Francis Baily, who first described them in 1836.
Date: Wednesday, August 12, 2026
Type: total solar eclipse (partial across most of Europe and beyond)
Path of totality: Arctic Russia, Greenland, Iceland, northern Spain, Balearic Islands
Maximum duration: about 2 minutes 18 seconds (only over the Atlantic; under 2 minutes on Spanish land)
Outside the path: partial eclipse only, visible in the evening
Watch the official NASA animation
This official visualization from NASA’s Scientific Visualization Studio follows the Moon’s shadow along its entire path around the globe, from Arctic Siberia to sunset over the Mediterranean.
Source: NASA Scientific Visualization Studio / Ernie Wright
2. Equipment: what you actually need
The one truly essential item, even more than the camera itself, is the solar filter: without it, you can’t shoot safely.
It must be a dedicated solar filter, certified to the ISO 12312-2 safety standard, always mounted on the front element of the lens.
Which lens to choose depends on the kind of photo you want to take.
A telephoto lens between 200mm and 500mm gives a satisfying close-up of the solar disk: with a 400mm on full frame, or 250-300mm on an APS-C camera, you already get a clearly visible Sun in the frame.
A wide-angle lens between 14mm and 35mm is the right choice if you want to include the landscape in the shot instead: the Sun will appear as a small bright point in the scene, but it can work very well as a compositional element.
You don’t need a special camera: any model with manual controls works, whether mirrorless or DSLR.
On an APS-C sensor camera, the crop factor works in your favor: a 200mm lens behaves optically like a 300mm on full frame.
You’ll need a sturdy tripod with a head capable of properly supporting the weight of the lens and filter, especially in windy conditions.
Always use a remote shutter release or an intervalometer: pressing the shutter button by hand, even on a tripod, risks introducing camera shake.
Always bring spare batteries and memory cards: the eclipse won’t wait, and there’s no second chance on the same day.
Finally, get certified ISO 12312-2 eclipse glasses for eye protection: you’ll need them regardless, even if your camera is protected by its own filter.
☐ Solar filter certified to ISO 12312-2 (mounted on the front of the lens)
☐ 200-500mm telephoto lens, or a 14-35mm wide-angle lens
☐ Camera with manual controls
☐ Sturdy tripod and head
☐ Remote shutter release or intervalometer
☐ Spare batteries and memory cards
☐ Certified ISO 12312-2 eclipse glasses
Where to find certified filters and glasses
This section contains Amazon affiliate links: if you buy through these links, I may earn a small commission at no extra cost to you. I only recommend products certified to ISO 12312-2.
- Certified ISO 12312-2 eclipse glasses (also includes 2 smartphone filters): see on Amazon
- Solar filter for camera lenses and telescopes (ISO 12312-2 certified sheet, cut to fit your diameter): see on Amazon
Note: the filter is a sheet to cut to size, not a ready-mounted accessory: measure the outer diameter of your lens or telescope, cut a disc slightly larger, and secure it with a support (e.g. a rigid cardboard ring) on the front so it can’t slip or fall off.
3. Settings and shooting technique
Always set manual mode: it’s the only way to have full control over such a bright and unusual subject.
Start around f/8: it’s the most common compromise between sharpness and brightness with the solar filter mounted.
Keep the ISO low, between 100 and 200, to avoid unnecessary digital noise: light, even filtered, is never in short supply.
For shutter speed, with the solar filter mounted during the partial phases, a good starting point is 1/500s: the exact value depends on the combination of filter density, aperture, and ISO, so adjust based on your light meter.
Use spot metering aimed directly at the Sun, not average metering: this avoids being fooled by the rest of the sky.
Always bracket your exposures, shooting a series at different shutter speeds around your base value: this gives you room to pick the best-balanced shot in post-production.
Focus manually on the edge of the solar disk: autofocus often struggles to lock onto such a uniform, low-contrast subject.
To check focus, zoom in on the image in live view on the LCD screen before shooting your final sequence.
Set white balance manually: you can still correct it precisely in post-production if you’re shooting RAW, which keeps far more recovery headroom than a JPEG.
Good color management in post-production helps keep the tones of the sky and the solar disk consistent, avoiding unwanted differences between screen and final file.
If you’re on a tripod, turn off image stabilization: on a stable support it can paradoxically introduce micro-vibrations instead of removing them.
A practical tip: take some test shots in the days before, at the same time of day and with the same filter mounted, so you arrive on August 12 with settings you’ve already tested instead of improvising on the spot.
If instead you choose the wide-angle approach, with the Sun reduced to a small point in the scene, focusing works differently: in this case it’s best to focus at the hyperfocal distance, to keep everything sharp from the foreground to infinity.
You can calculate the exact hyperfocal distance for your lens and camera with the free long exposure, DOF and focus stacking calculator, instead of relying on approximate values.
Mode: manual
Aperture: f/8
ISO: 100-200
Shutter speed: 1/500s (adjust with your light meter)
Metering: spot, on the solar disk
Focus: manual, on the edge of the Sun, checked in live view
Bracketing: recommended, several shots around the base shutter speed
✗ Never look at the Sun without certified ISO 12312-2 filters
✗ Never use regular sunglasses as protection
✗ Never look at the Sun through a camera, binoculars, or telescope without a dedicated solar filter
✗ Never use photographic ND filters instead of solar filters
✗ Don’t improvise camera settings on the day itself: test them in the days before
4. Where to see totality
If you want to see true totality rather than a partial eclipse, you’ll need to travel into the path of totality: Arctic Russia, Greenland, Iceland, northern Spain, and the Balearic Islands.
Northern Spain is the most accessible destination for most of Europe, with the path crossing Galicia, Asturias, Cantabria, the Basque Country, the Zaragoza area, Catalonia, and Valencia, as well as the Balearic Islands.
In Spain, the Sun will be very low on the horizon during totality, between 4 and 10 degrees depending on the location: a condition that makes for a particularly striking eclipse, but requires a genuinely clear horizon to the west.

Source: NASA / Keegan Barber
The other two areas of totality are Iceland, with Reykjavík inside the path, and Greenland: both farther away, with historically less predictable summer weather than Spain.
| City | Totality begins | Totality ends |
|---|---|---|
| León, Spain | 8:28pm | 8:30pm |
| Zaragoza, Spain | 8:29pm | 8:30pm |
| Valencia, Spain | 8:32pm | 8:33pm |
| Reykjavík, Iceland | 5:48pm | 5:49pm |
Source: NASA Science, official eclipse page. All times local.
5. Where to see a partial eclipse
For the United Kingdom and Ireland, this will be the best partial solar eclipse of the century: coverage will reach 90-96%, with London at 91%, Cornwall around 95%, and south-west Ireland up to 97.5%.
Outside the path of totality, much of Europe will still see a very deep partial eclipse: Paris will reach 92%, Berlin 85%, and Madrid and Barcelona, though outside the path of totality, will reach a striking 99%.
In North America the eclipse will be much lighter: in the United States, Anchorage, Alaska will reach 28%, New York 9%, and Philadelphia 7%. In Canada, St. John’s, Newfoundland will reach 53%, Montreal 18%, and Toronto 8%.
North-western Africa will also see a partial eclipse, in the evening hours like the rest of Europe.
Wherever you are outside the path of totality, the event will happen in the evening, with the Sun already low on the horizon: look for a viewing spot with a clear view toward the west or west-northwest, with no buildings, trees, or hills blocking the view.

Source: NASA Science
| City | Maximum coverage |
|---|---|
| Madrid, Spain | 99% |
| Barcelona, Spain | 99% |
| Lisbon, Portugal | 95% |
| South-west Ireland | up to 97.5% |
| Dublin, Ireland | 94% |
| Cornwall, UK | ~95% |
| London, UK | 91% |
| Milan, Italy | 92% |
| Rome, Italy | ~69% (INAF) |
| Paris, France | 92% |
| Oslo, Norway | 83% |
| Stockholm, Sweden | 81% |
| Berlin, Germany | 85% |
| Vienna, Austria | 85% |
| Kraków, Poland | 64% |
| Casablanca, Morocco | 87% |
| Algiers, Algeria | 96% |
| St. John’s, Canada | 53% |
| Montreal, Canada | 18% |
| Toronto, Canada | 8% |
| New York, USA | 9% |
| Philadelphia, USA | 7% |
| Anchorage, Alaska, USA | 28% |
Percentages: NASA Science, official eclipse page. Rome: simulations by the Italian National Institute for Astrophysics (INAF), as reported by Italian science press.
6. Safety: what you need to know before you shoot
This is the most important section in the whole guide: getting this wrong means risking permanent damage to your eyesight or your camera.
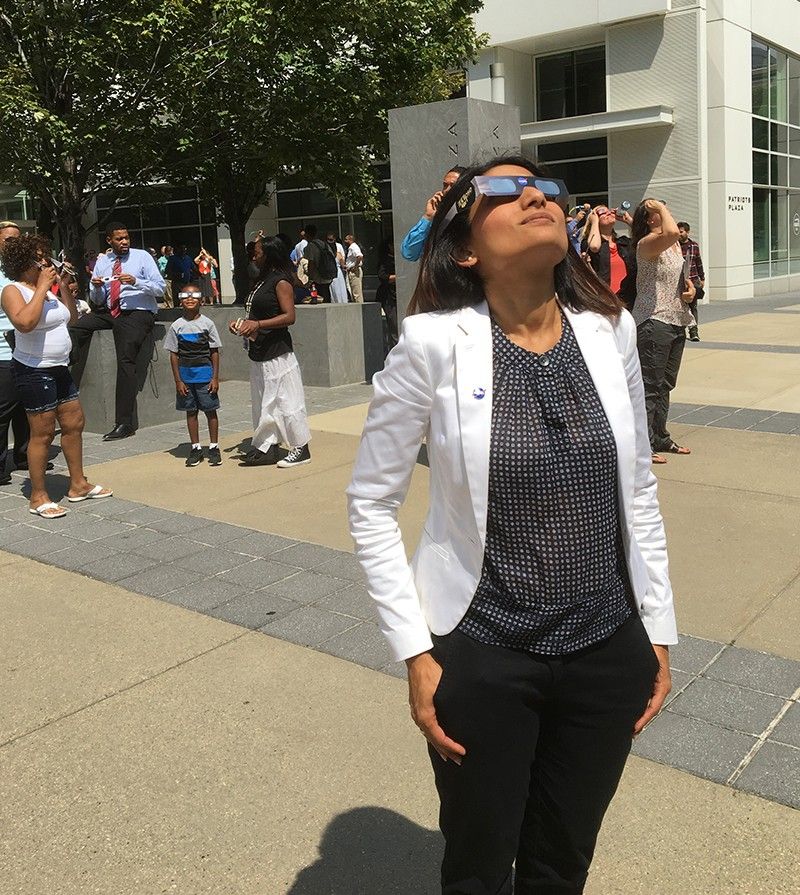
Source: NASA Science
If you already work with ND filters for long exposure photography, you know how dark they can get. And yet, even the darkest ND filter isn’t safe for photographing the Sun: it reduces visible light, but doesn’t sufficiently block the infrared and ultraviolet radiation the Sun emits.
You need a dedicated solar filter, certified to the international ISO 12312-2 standard: the same standard required for eclipse glasses.
The solar filter must always be mounted on the front element of the lens, never in a rear filter tray: some professional telephoto lenses have a rear slip-in tray meant for regular photographic filters, not suited for pointing at the Sun.
Always use live view on the LCD screen, or the electronic viewfinder of a mirrorless camera, to compose and focus.
If you have a telescope and want to use it to observe the eclipse, the same rule as with a camera applies: you need a dedicated solar filter that covers the entire front aperture of the instrument, never a small filter placed at the eyepiece end.
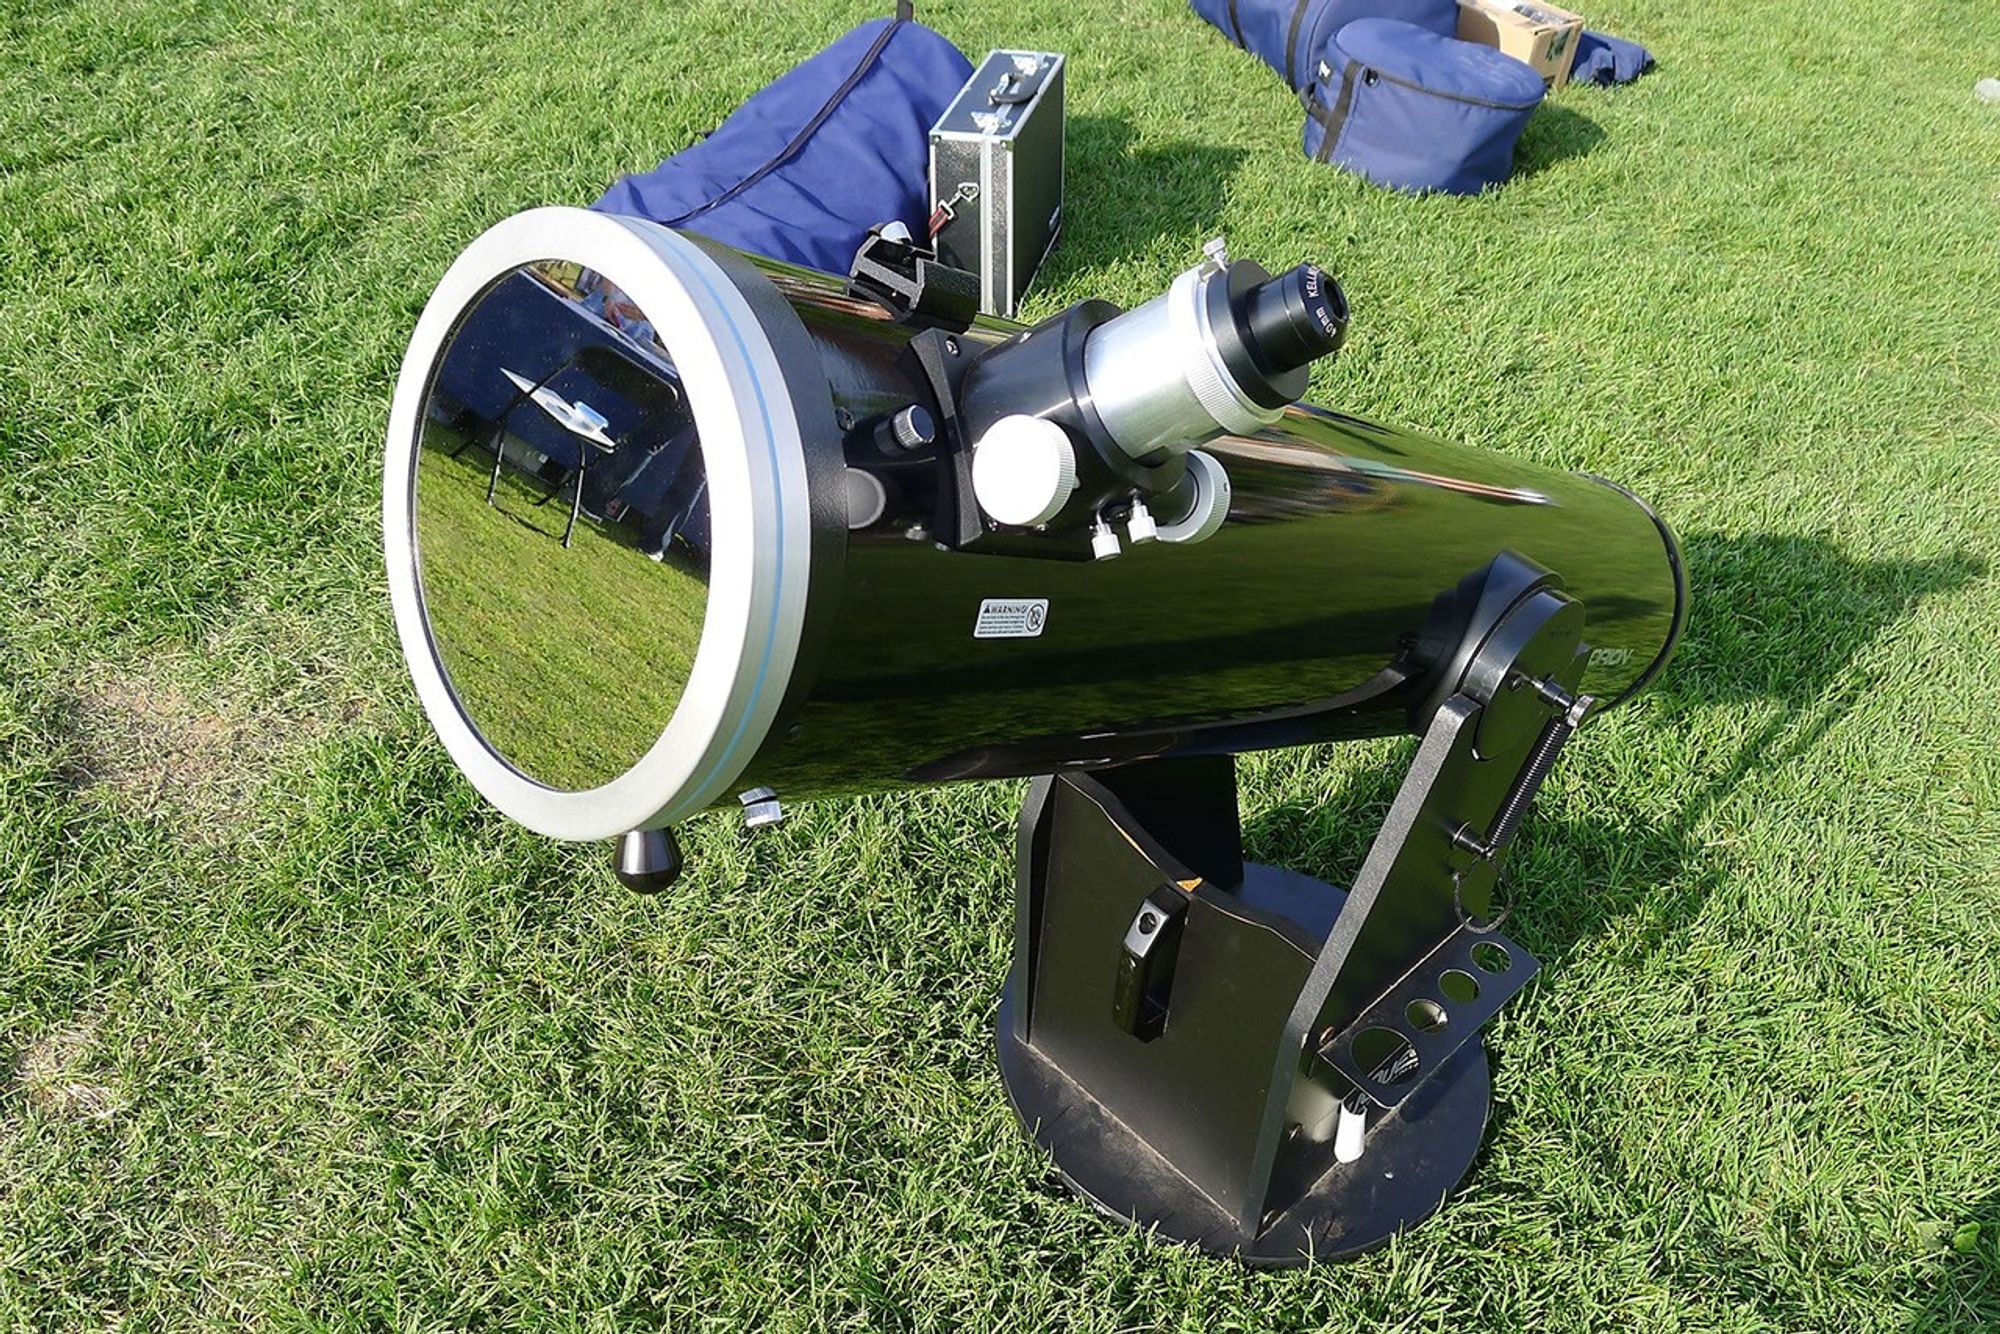
Source: NASA Science / Carolyn Slivinski
To align your telescope toward the Sun, never look through the instrument itself: aim it by watching the shadow it casts on the ground, adjusting until the shadow becomes as small and circular as possible.
Don’t forget the finder scope (the small optical sight mounted on the telescope): it has a separate optical path from the main tube, and is just as dangerous if left unfiltered or not removed.
Never wear eclipse glasses while looking through an unfiltered telescope or binoculars: the light already concentrated by the instrument would burn straight through the glasses’ filter, which is designed only for naked-eye protection.
Outside the path of totality, where the eclipse stays partial the whole time, the solar filter should never be removed during the entire event, unlike those watching totality in Spain or Iceland, where the filter comes off only for the few minutes of full coverage.
1. Never use a regular ND filter instead of a certified ISO 12312-2 solar filter
2. Never point an optical viewfinder at the Sun: always use live view or an electronic viewfinder
3. Never remove the filter outside the path of totality: if you’re not experiencing full totality, the eclipse stays partial for its entire duration
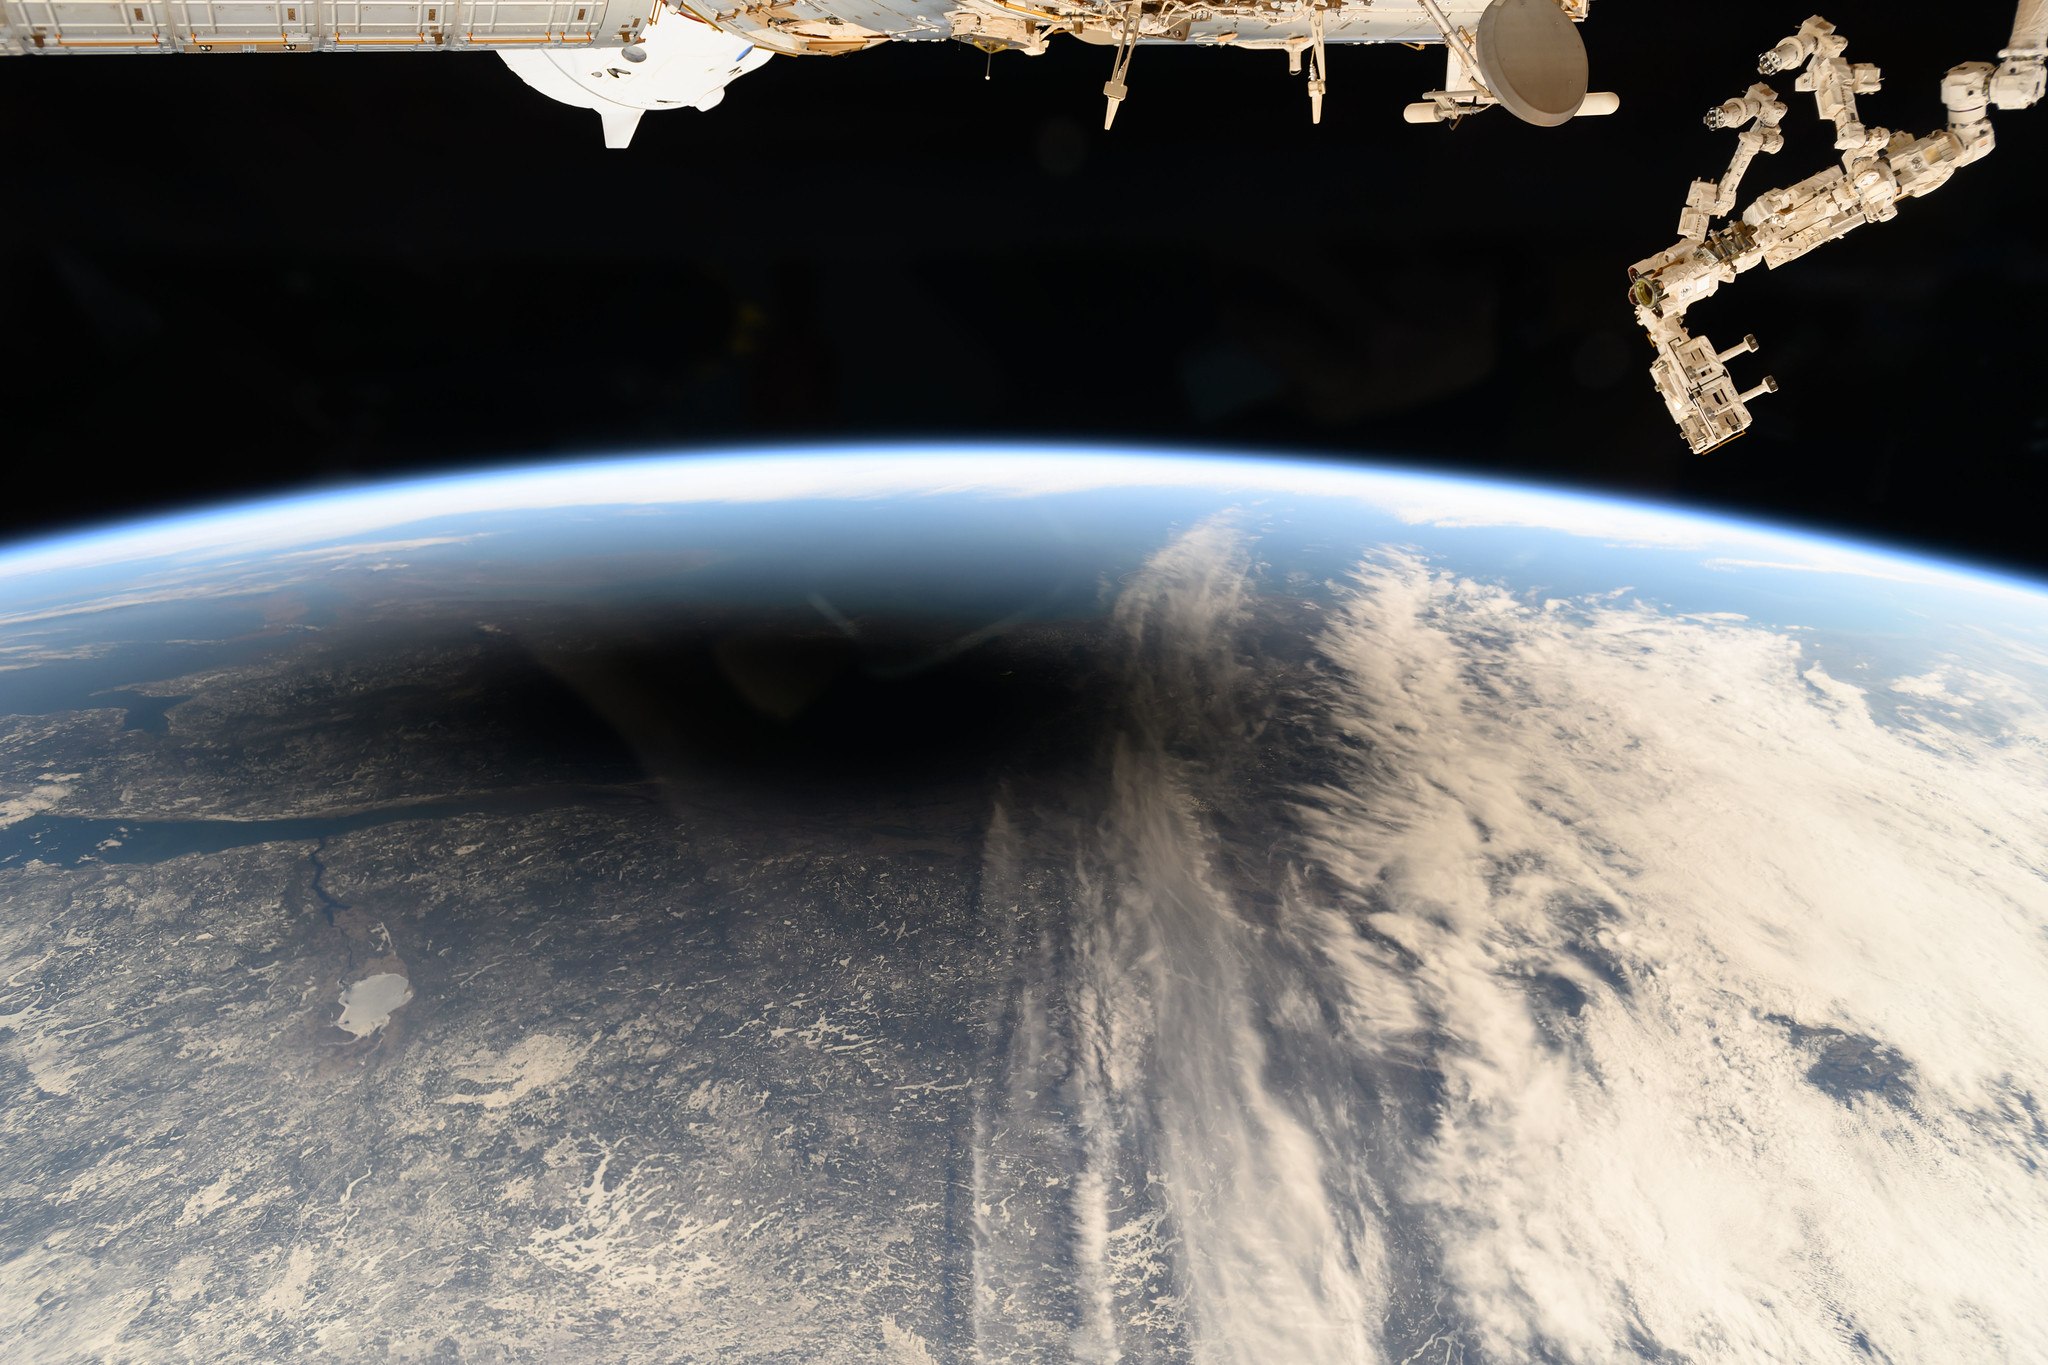
Source: NASA
Frequently Asked Questions
Will my ND1000 filter work for photographing the eclipse?
No. An ND1000 only reduces visible light, not the infrared and ultraviolet radiation the Sun emits. You need a dedicated solar filter certified to ISO 12312-2, which blocks at least 16 stops across the entire spectrum, not just the visible part.
Can I photograph the eclipse with a smartphone?
Yes, but if you’re framing the Sun directly you’ll still need a small dedicated solar filter attached to your phone’s lens: the sensor, however small, can still be damaged by direct, prolonged exposure.
Do I need to remove the solar filter if I’m only seeing a partial eclipse?
Never. Outside the path of totality the eclipse stays partial: the Sun is never fully covered, so the solar filter must stay mounted for the entire event, from start to finish.
How long will totality last in Spain?
Up to about 1 minute 48 seconds in the Asturias and Cantabria region, in northern Spain. The absolute maximum of 2 minutes 18 seconds occurs only over the Atlantic Ocean, not at a point reachable by land.
Can I look at the partial eclipse without protection, even for a moment?
Never, not even for an instant, and not even when coverage looks almost total. You always need protection certified to ISO 12312-2, whether observing with the naked eye or through a camera’s optical viewfinder.
My telescope has a solar filter that screws into the eyepiece: is that okay?
No, avoid it. A filter mounted at the eyepiece, on the side where your eye goes, receives light and heat already concentrated by the telescope: it can crack or shatter suddenly from overheating. You need a solar filter that covers the entire front aperture of the instrument instead.
Do I need a telescope to observe the eclipse?
No, it’s optional. Certified ISO 12312-2 eclipse glasses are enough for naked-eye viewing, or a camera with a solar filter if you also want to photograph it. A telescope is only useful for extra magnification.
Can I still see the eclipse if it’s cloudy?
It depends on how thick the clouds are: thin, high clouds may let you glimpse a dimmed version of the event, but thick cloud cover blocks it entirely. There’s no way to control the weather, so it’s worth choosing an area with better forecasts in advance and staying flexible on your exact viewing spot.
Is it dangerous to look at the eclipse through a DSLR viewfinder?
Yes, very. A DSLR’s optical viewfinder concentrates light exactly like a small unfiltered telescope, with the same risk to your eyes. Always use live view on the LCD screen instead, even with the solar filter mounted.
Can I photograph the eclipse without a telephoto lens?
Yes. With a wide-angle lens you can include the landscape in the shot, with the Sun reduced to a small element of the composition: a different but equally valid approach compared to a telephoto close-up.
What focal length is recommended for photographing the eclipse?
Between 200mm and 500mm for a satisfying close-up of the solar disk. If you want to include the landscape instead, a wide-angle lens between 14mm and 35mm is the right choice, with the Sun as a small element in the scene.
Can I use a mirrorless camera?
Yes, it works great: in fact, a mirrorless camera’s electronic viewfinder is safer than a DSLR’s optical viewfinder, since it never exposes your eye directly to the light concentrated by the lens.
Can I photograph the eclipse with a drone?
Better to avoid it: drone sensors aren’t protected by dedicated solar filters, and pointing the camera at the Sun risks permanently damaging them. Many areas also have flight restrictions during evening hours.
The eclipse of August 12, 2026 is a once-in-a-generation event for Europe: the next total solar eclipse visible from the continent won’t happen again for many years. Whether you stay put for the partial phase or fly to Spain for totality, the difference between a great photo and a needless risk to your eyes and gear comes down to preparation: the right filter, settings tested in advance, and no shortcuts on safety.
Official sources
This guide was written using exclusively authoritative scientific sources:
Questions about the gear or how to photograph it?
Write to me using the form below!